

Hello there, EverBees!
We hope you're enjoying your EverBee Email and all its features.
Here, we'll help you add subscribers and upload the CSV file (your email address list) to your account. Note¹: Depending on your Email Plan, there are limitations to adding and/or uploading.
e.g., Email Free Plan:
- Up to 250 subscribers (this can be achieved by adding, uploading, and/or directly by your customers through your Landing Pages
- If your CSV file has over 250 email addresses, it will present an error message. Understanding that you're starting with 00 (zero) subscribers.
- The CSV file is required to have 02 columns ONLY (Name and Email). Both columns must have their header (Name and Email) and be filled out. If you leave any of them empty, an error message will also appear
- A sample of the CSV file can be downloaded from your EverBee Email
(CSV file sample view)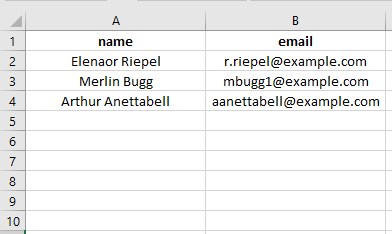
Add Subscribers
- Access your account (EverBee Email)
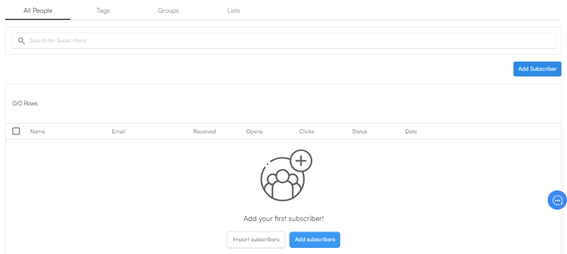
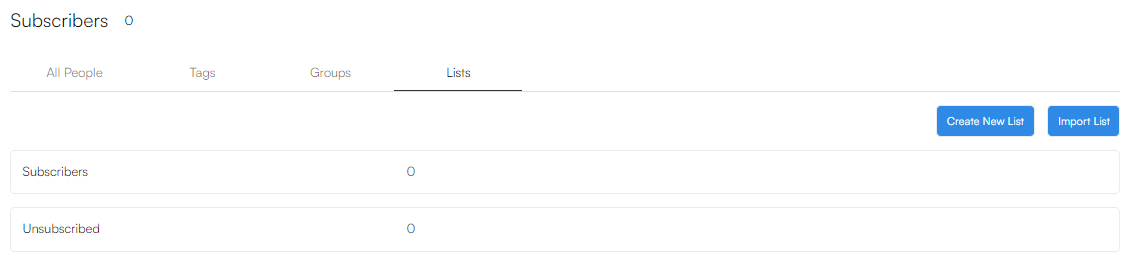
- Go to Subscriber > All People tab
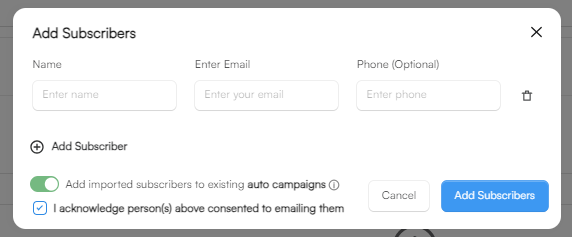
- Click > Add Subscriber button
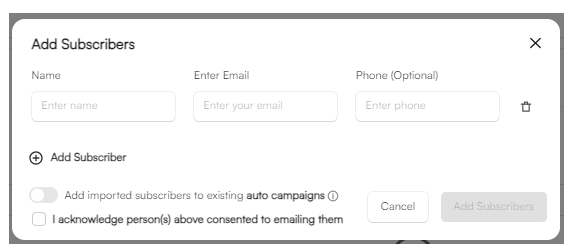
- On each box, type your customer info. (phone is optional)
- Confirm that your customers have consented to you emailing them (please check below)
- The Add Subscribers button will be highlighted in light blue
Note²: By adding your customer details, YOU acknowledge that they've consented to email them
- While adding customer info., you can also add these subscribers to your existing Auto Campaigns
- If turned ON, the imported subscribers will be added to ALL existing "Auto Campaigns" that use the "Subscribe" event to send emails. If you do not want the imported subscribers added to these emails, keep it OFF
- This only applies to existing campaigns that use the "Subscribe" event and not to campaigns created after the import.
- To turn it on, click on the toggle located at the left
Import List
- Go to Subscriber > Lists tab
- Click > Import List button
- If you don't have one ready yet or aren't sure if your CSV file is correct, please click "View Example" (at the top, highlighted in light blue). A sample will be automatically downloaded. You can check it and compare it (to yours), or also use it
3. Click the > Browse Files button
4. List Title (optional) > You can name your List
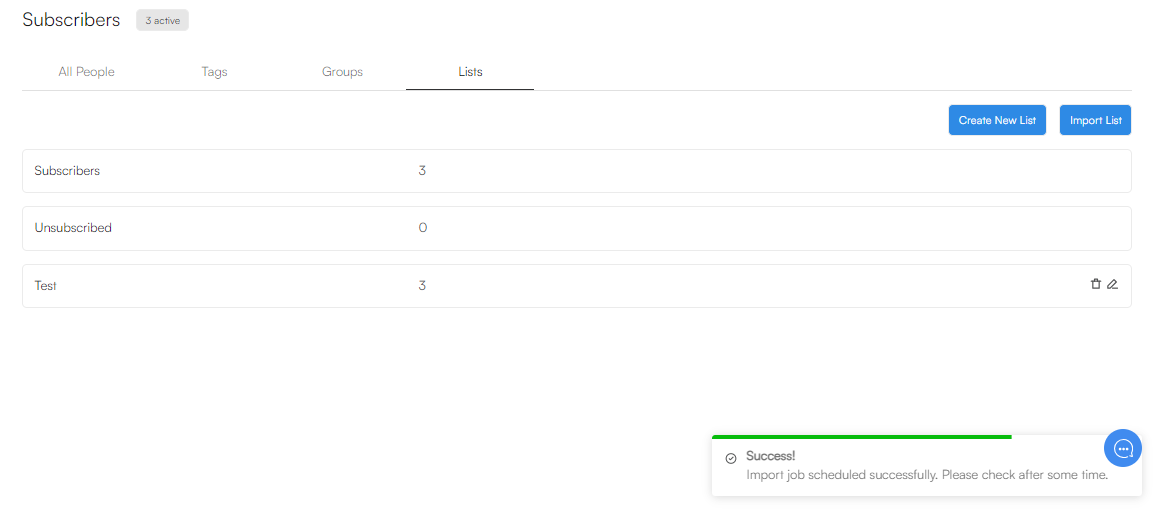
5. On the Subscribers tab, you can see all your subscribers and unsubscribers as the created or imported Lists if you've named them. (It works to help you create different campaigns for each distinct group of customers)
6. Tags (optional) > Check here for further info. (Add tags when uploading a CSV file is optional)
7. Confirm that your customers have consented to you emailing them (please check on Add Subscribers)
8. The Import button will be highlighted in light blue
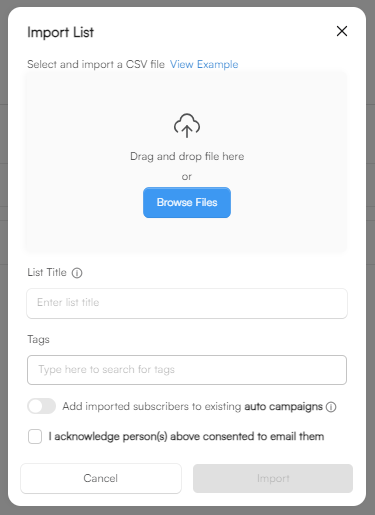
- Of course, you can also add this list to existing Auto Campaigns (please check on Add Subscribers)
- A confirmation message will appear (at the lower right corner of your screen)
Related Articles:
- How to Optimize Your Tags
- How to Dominate Etsy with Email Marketing Tactics
- EverBee Email - Advanced Campaign
Need Help?
If you have any further questions, please start a Live Chat. You can also click on the Chat Icon in the lower right corner to talk with our support team.